SBD : Helix Locations
GHub Platform · Гайд · 0 ответов · 19 просмотров
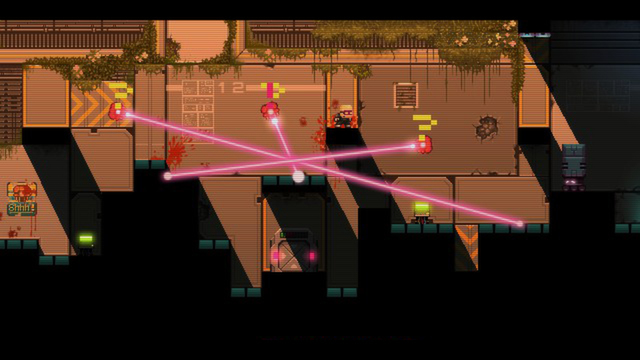
Opening Notes Just to explain myself on why I took the visual guide approach instead of going the video route. I built this guide to show the helix locations. I think a screenshot showing where the helix is the most efficient way to do this. Obviously some of the levels (e.g. 2-9, 3-8, 8-1) require more actions to collect the helix and those would have benefited from a video but the majority are just fine with screenshots. The goal of this guide is to Show where the helix is in each level Suggest how to get the helix in each level It is assumed that you already have working knowledge on the levels so this guide will NOT Show you how to reach the helix from the starting position Show how to complete a level I helped UnableRouge / EweChewBrrr01 with a video walkthrough for helices and have the videos for all the level 9's on my Steam profile as well as YouTube . For the rest of the levels you can refer to UnableRouge's video guide . Please note that this guide does NOT cover the levels in the DLC (Stealth Bastard Deluxe - The Teleporter Chambers). I made a separate guide to cover that - SBD - The Teleporter Chambers : Helix Locations . If you're looking for guides to S-rank levels, I have a handful of levels covered in my YouTube playlist . For all other levels, Double Dark's Steam guide has got you covered. Basics Stealth Bast*rd Deluxe (SBD) is divided into 8 sectors. Each sector has a total of 10 chambers. Each chamber has a starting point and an exit. The goal of the game is to reach the exit from the starting point. Each chamber has a helix which is typically hidden from plain sight or placed at a position that makes it difficult to get. Upon completion, you will be given a rank based on your completion time (TIME), number of deaths (DEATHS) and the number of times you were spotted (SPOTTED). The ranks in descending order are S, A, B, C, D whereby S is the highest rank and D is the lowest rank. In order to achieve S rank you need to get 3 stars for TIME, DEATHS and SPOTTED. The target(s) you need to meet will be shown in the completion screen. Note: You are not allowed to use any EQUIPMENT to achieve S-rank. In this guide, the levels are referred to in the format of <sector> - <chamber> (e.g. 1-1 is Chamber 1 of Sector 1) Chambers 1-8 are unlocked in linear order when you complete the chamber before it. (e.g. completing 1-1 will unlock 1-2) Chamber 8 of each sector is the sentinel level (boss level). Chamber 9 is unlocked when you S-rank chambers 1-8 in a sector. (e.g. S-rank 1-1 til 1-8 will unlock 1-9) Chamber 10 is unlocked when you find all helices in chambers 1-8 in a sector (e.g. collecting all helices from 1-1 til 1-8 will unlock 1-10) Once you've completed Chamber 8 of a sector, you unlock equipment for that sector (the camo suit will be unlocked for all levels in the sector). (e.g. completing 1-8 unlocks equipment in 1-1 til 1-10) Subsequent plays of levels in that sector will unlock the next piece of equipment until all equipment has been unlocked. The order in which equipment is unlocked is the same for all levels and is shown at the equipment select screen. CAMO SUIT --> DECOY --> SONIC DECOY --> ANTILIGHT --> TELEPORTERS Once you've unlocked all equipment on any 3 levels of a sector, all equipment will be unlocked in all levels of the sector. (e.g. unlocking all equipment in 1-1, 1-5, 1-8, will unlock all equipment in 1-1 til 1-10) Helices Some of the hidden helices will be revealed when events are triggered (e.g. hacking terminals, turning on switches/sensors). Among these helices, some are accessible before they are revealed whereas others are only accessible after triggering an event meaning that some of the reveals are just to hint the location or path to the helix. When playing a level, a special sound effect is played when you pickup the helix and the helix icon will appear at the bottom right corner of your screen. Note that you only get the helix if you complete the level with it. So if you get killed after picking up the helix but before you reach the next checkpoint, ALWAYS REMEMBER TO PICKUP THE HELIX AGAIN . Once you have completed the level with the helix, the helix no longer spawns in the level and a helix icon will be shown at the chamber select screen. You CAN pick up helices while using equipment. 1-1 SEND IN THE CLONES Before the level proper starts, you are still able to explore the surroundings. You will find the helix on top of the trapdoor to the start of the actual level. 1-2 PRIMER As you approach the final terminal at the bottom left, instead of jumping up to the terminal, crouch and move left to reveal the hidden area with the helix. 1-3 CAMERA CONTROL Once you reach the section shown in the screenshot below, position yourself in the light so that you will be spotted by the 1st camera. This will reveal the hidden helix's position. Remain in sight of the camera until the laser is at a position where you can run pass without getting spotted by the camera and get to a position opposite of the laser movement. [Note: The laser moves from left to right and back]. Once the laser is far enough remain hidden until the laser stops. Run past the laser and get spotted by the camera so you can pick up the helix. 1-4 PRESSURE’S ON Once you watch the clone die, run all the way to the left and activate the pressure plate. Activating the pressure plate will cause the laser to switch on and move towards the left. The opening will also become bigger as long as the pressure plate remains activated. As soon as the laser hits the platform you are standing on, jump up to deactivate the laser and pick up the helix which was hidden at the end portion of the opening. 1-5 CRAWL SPACE Once the room at the top has been unlocked, use the block to jump towards the top left of the room as shown in the screenshot below. Jump up again to reveal the hidden area with the helix. 1-6 LASER BURNS Once the terminal in the screenshot below has been hacked, the helix will be revealed. Pick up the helix by making use of the ledge next to the helix. 1-7 SHADOW PUPPET When the final terminal has been hacked, a small opening on the right will appear. Crouch and crawl into that opening to reveal the hidden area with the helix. 1-8 MEET THE BOSS In the wall directly above the starting position, there is a hidden area which you can jump in to. Once you're in the hidden area, jump up to activate the pressure plate to make the wall blocking your way move up so you can pick up the helix. 1-9 WORKING THE CAMERAS When the terminal has been hacked, there is a small area at the top that opens up. [You can notice this from the change in the shadows. Compare the 2 screenshots below. After the terminal has been hacked, you can see the white stripes.] Go to the top, jump up and latch on to the hidden ledge on the left wall. Then jump into the hidden area to pick up the helix. 1-10 MOVING TARGETS When the block has been released, go top to where the block dropped from and jump into the hidden area on the right of the chamber that contained the block. 2-1 TURRETS SYNDROME After you've hacked all the terminals, push the block down so that it falls through the opened trapdoor. Turn the switch on to close the trapdoor. Push the block onto the trapdoor and position it such that the block is on top of the turret below. Turn the switch off to open the trapdoor. When the turret is killed, a hidden trapdoor to the helix will be revealed. 2-2 DEATH FROM ABOVE When the left most terminal has been hacked and the lights are off, you will notice some light coming from the area directly on top of the lift when the lift is at the bottom. The 2 screenshots below show the difference when the lift is at the top and when the lift is at the bottom. Turn the switch back to it's original position (off) so that the lift is at the bottom and the trapdoor at the top is open. Use the block to jump up into the hidden trapdoor and pick up the helix. 2-3 AGGRESSIVE CO-WO
ИсточникGHub Platform · автор23.08.2026, 01:53:56
Opening Notes Just to explain myself on why I took the visual guide approach instead of going the video route. I built this guide to show the helix locations. I think a screenshot showing where the helix is the most efficient way to do this. Obviously some of the levels (e.g. 2-9…
Войдите, чтобы писать в группе